Apply Templates via Jira Automation or API
When creating issues through Automation or an API, you might need to apply templates. For instance, if tests fail in Xray, an issue can be automatically generated. In such cases, this feature ensures that templates are seamlessly applied to the auto-created issues.
Apply Template via Automation
With Jira automation, you can apply templates to issues. Below are the steps:
Generate token
Go to “Apps” on the top navigation bar
Go to “Manage Your Apps”
Open “Issue Templates Config” from the left bar
Go to “API Tokens”
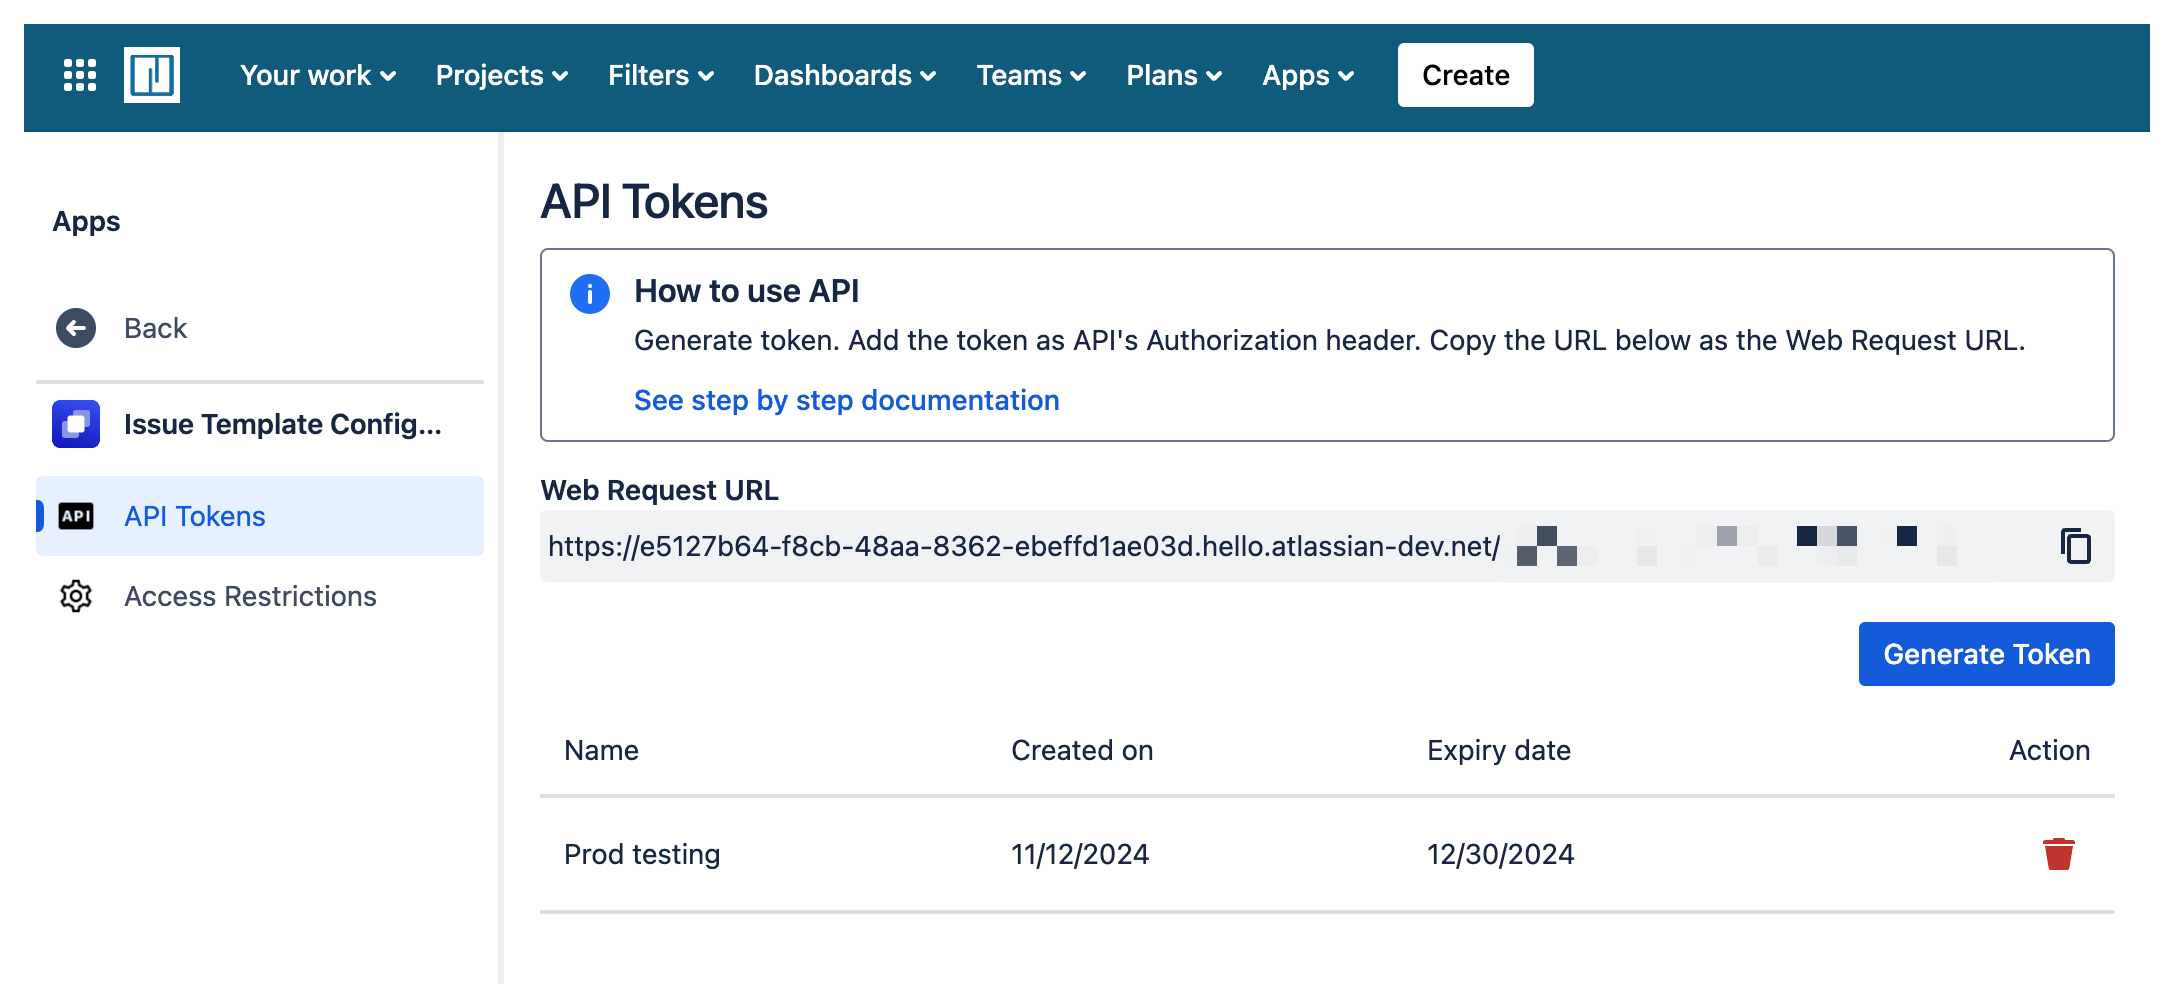
API Tokens
Click “Generate Token”
Fill in the token label and expiration date
Copy the token
Note: once the generate token window is closed, token cannot be viewed again.
Create Automation Rule
Create an automation that adds Web request URL after creating a new issue. Please see https://www.atlassian.com/software/jira/guides/automation/tutorials#manage-automation-rules for Jira automation tutorial.
Add a “Send web request” component as rule action.
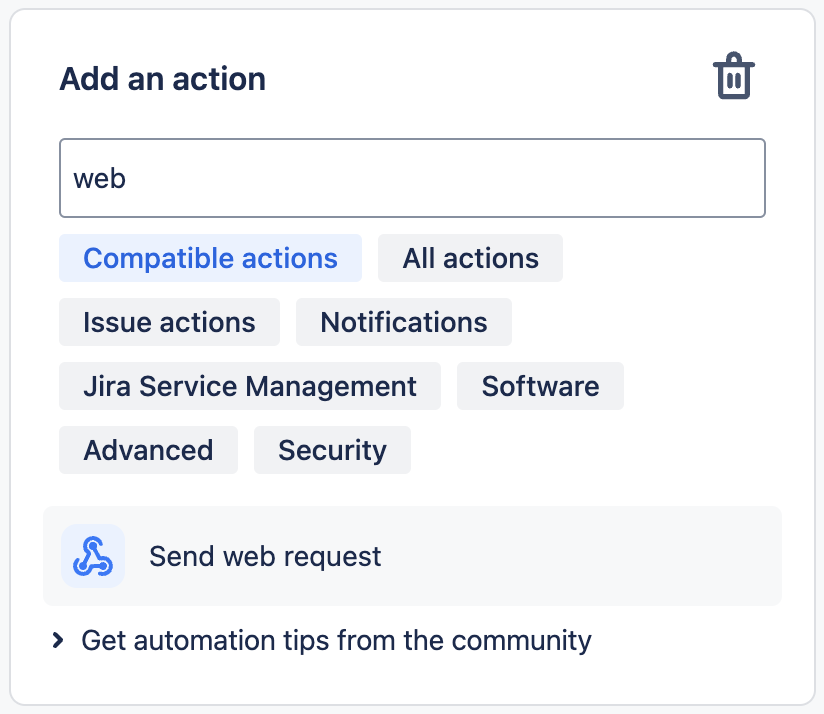
Web request component
Fill in the Action with the following:
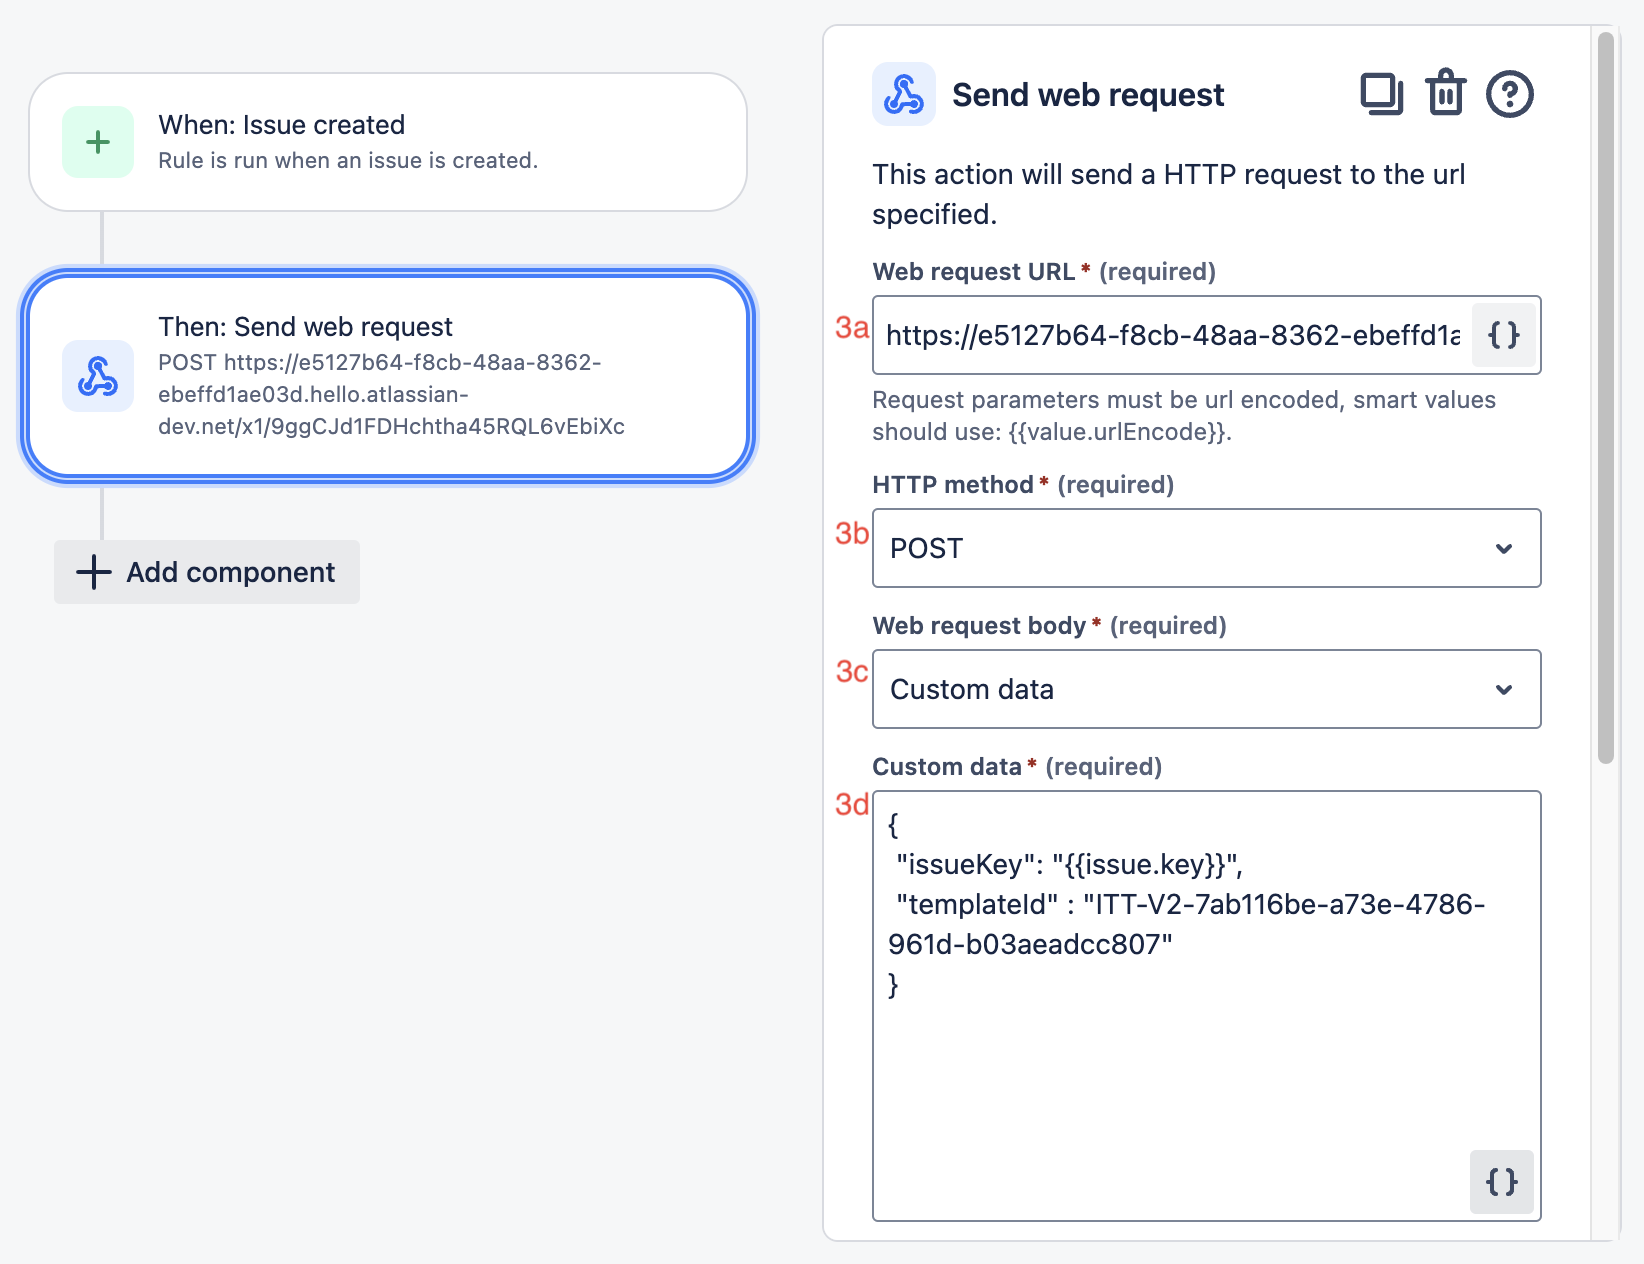
Web Request params
To ensure that the rule does not overwrite important data, you can add a condition to check if issue description field emply or has only short value.
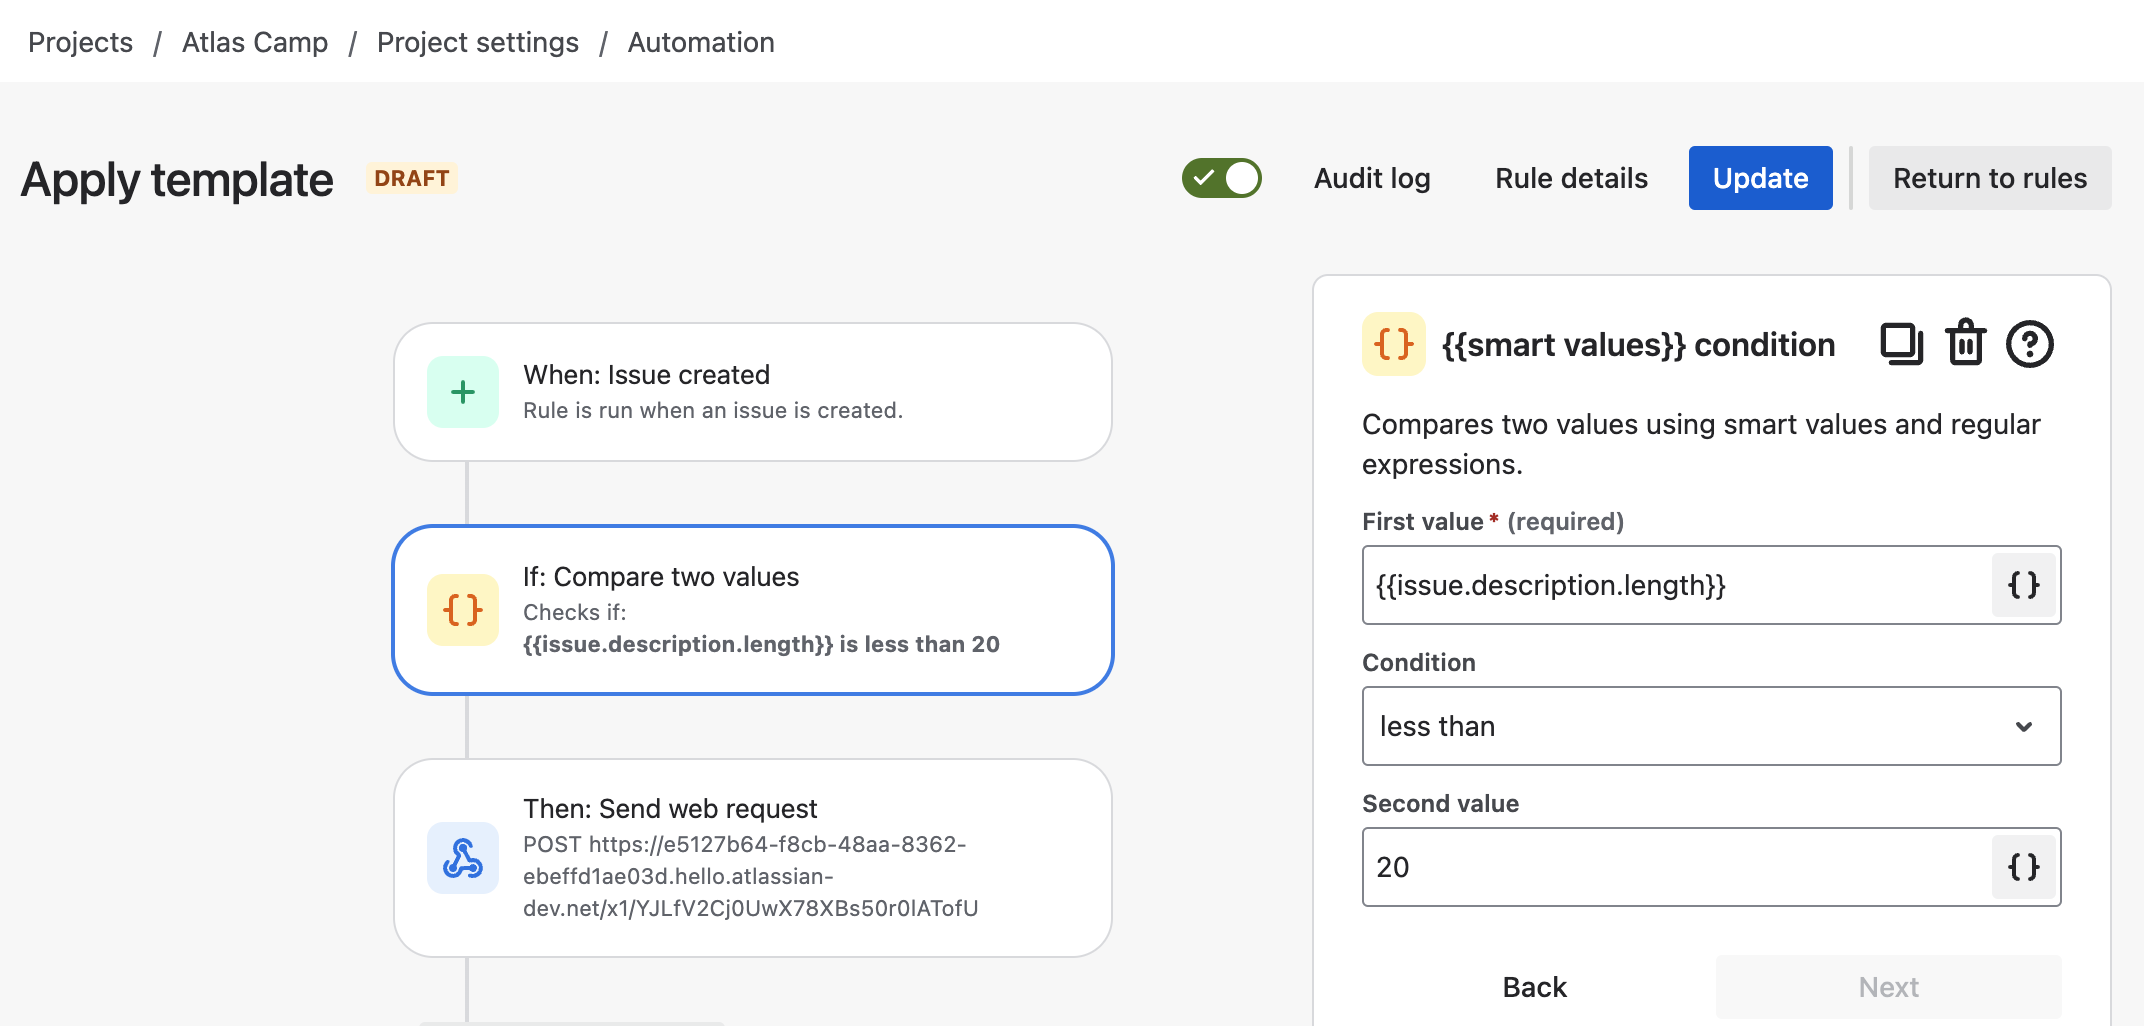
Add if condition to check description field
a. Web request URL: [URL]
To get the web request URL, go to back to API Tokens page: Top Nav → Manage Your Apps → Issue Templates Config → API Tokens and copy the Web request URL.

Web request URL
b. HTTP method: POST
c. Web request body: Custom data
d. Custom data:
{
 "issueKey": "{{issue.key}}",
 "templateId" : "IT-V2-039e00da-3703-4d2f-a7d3-6490ece4880a"
}
issueKey is the key of the newly created issue. It is auto-generated by Jira. You can leave this as is.
templateId is the template you would like to apply. To get the templateId, please navigate to the Issue Templates Pro app → Click action (…) → Copy templateId.

Action menu
e. Headers (optional):
Key: Authorization
Value: Bearer [token]
Paste the generated token in Value field, after Bearer.

Web Request authorization header
Apply Template with API
Following similar approach, you can also apply template with API. In this example, we are using Postman.
Generate token
Please see above how to generate token: Apply Templates via Jira Automation or API | Generate-token .
Configure the API
Use the POST URL with the web request URL.
To get the web request URL, go to Apps on the top navigation bar → Manage Your Apps → Issue Templates Config from the left bar → API Tokens → Copy the Web request URL.

Web request URL
Fill in the generated token.
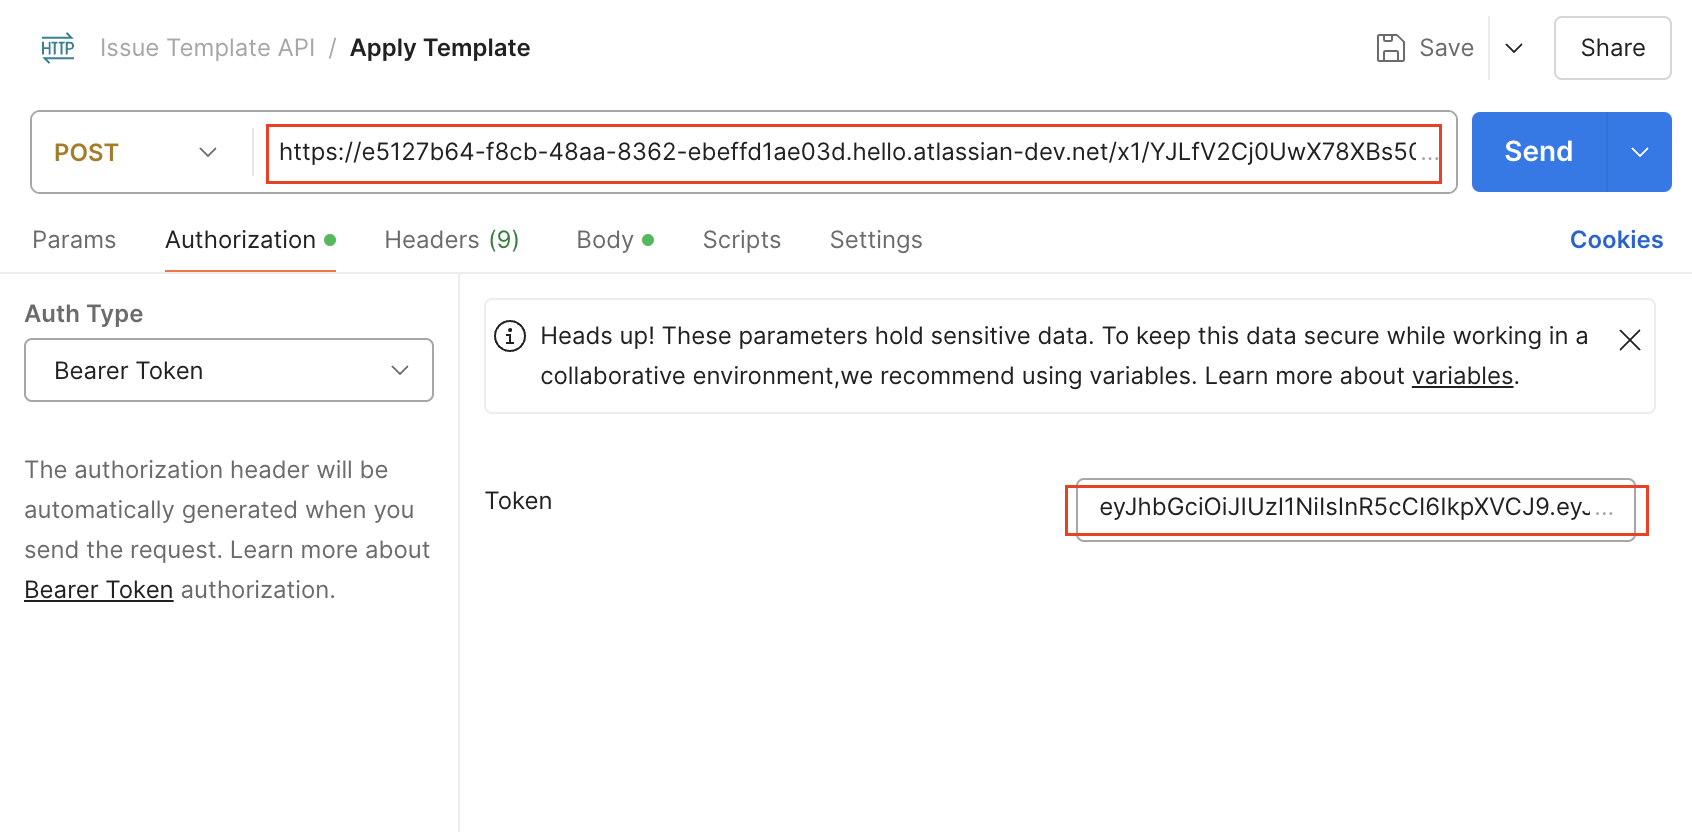
Postman - Authorization tab
Use the following parameters inside Body.
{
 "issueKey": "{{issue.key}}",
 "templateId" : "ITT-V2-039e00da-3703-4d2f-a7d3-6490ece4880a"
}
templateId is the template you would like to apply. To get the templateId, please open the Issue Templates Pro app → Click action (…) → Copy templateId.
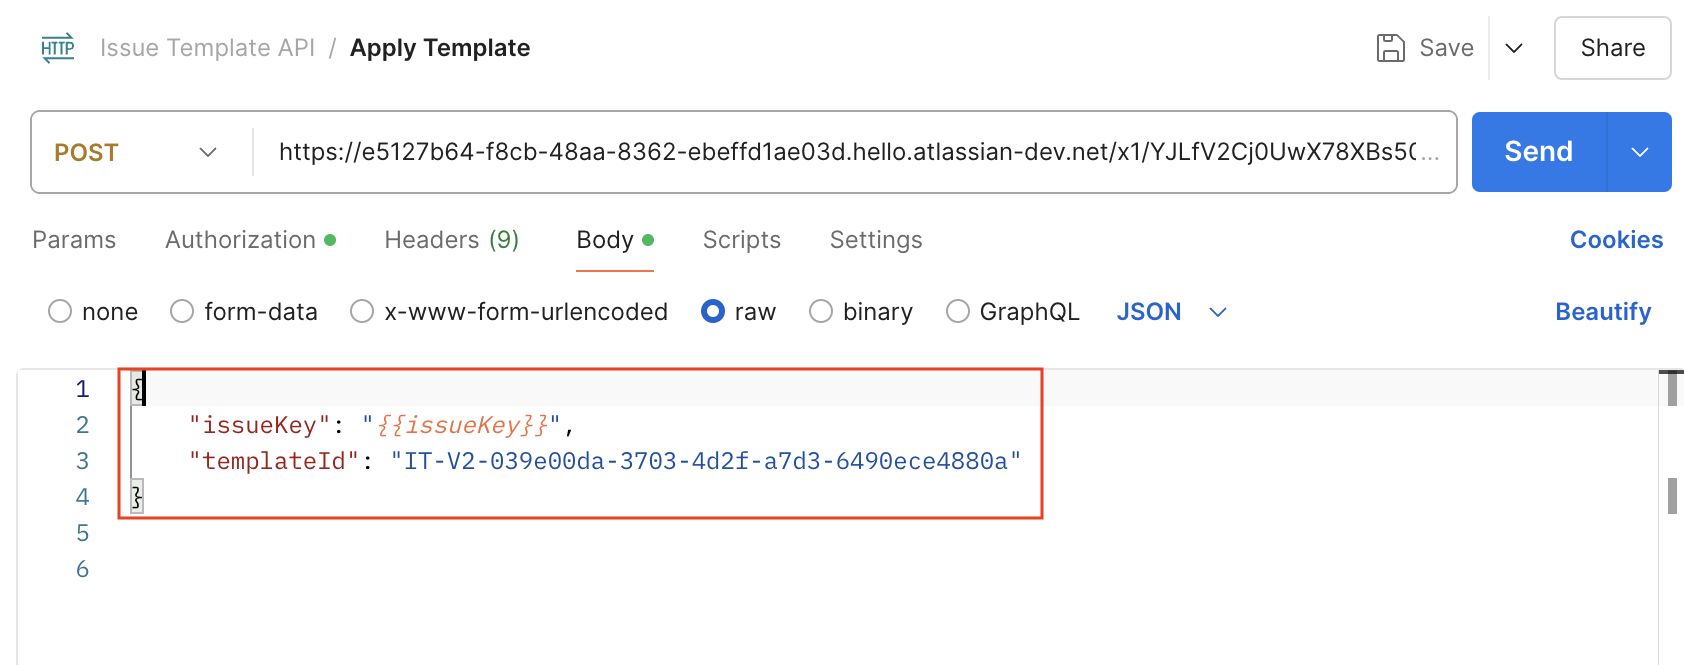
Postman - Body tab
HTTP Response and Error
The summary of the HTTP response codes is given below.
HTTP Response Code | Remarks |
|---|---|
200 | Template is successfully applied to the issue. |
401 | Wrong authorization or wrong token. |
404 | Template is not found. |
400/424 | Issue is not found. |
